8. Data#
8.1. Displaying skims#
Opening skims in Polaris is best done after opening a project, by accessing the Skims menu in the Polaris panel

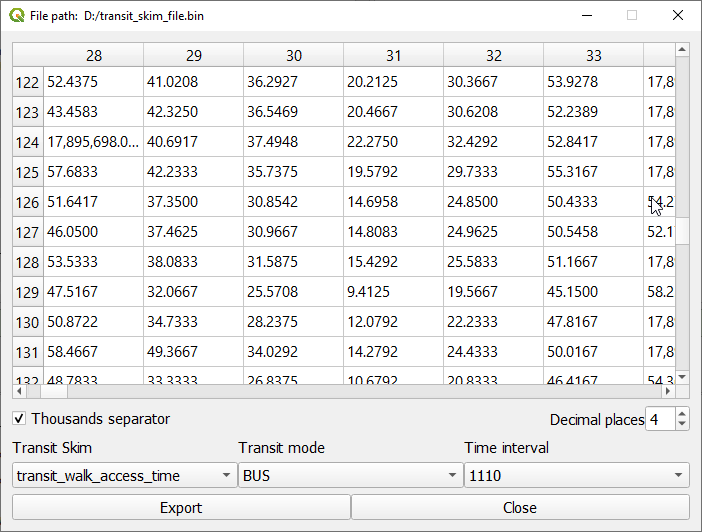
If a project is open, the user needs to just select whether they want to open a auto or transit skim and the GUI will automatically display the matrix on screen and load the zones layer from the model supply file.

After opening a skim, the user will have access to a display where they can choose the exact skim they want to display by skim type, interval and transit mode (if applicable).

Displaying skims in Polaris can also be done without opening a project by following the steps above. In this case, however, after clicking the desired skim type the user will need to navigate to the skim file they open to open.
8.1.1. Displaying zones and skims#
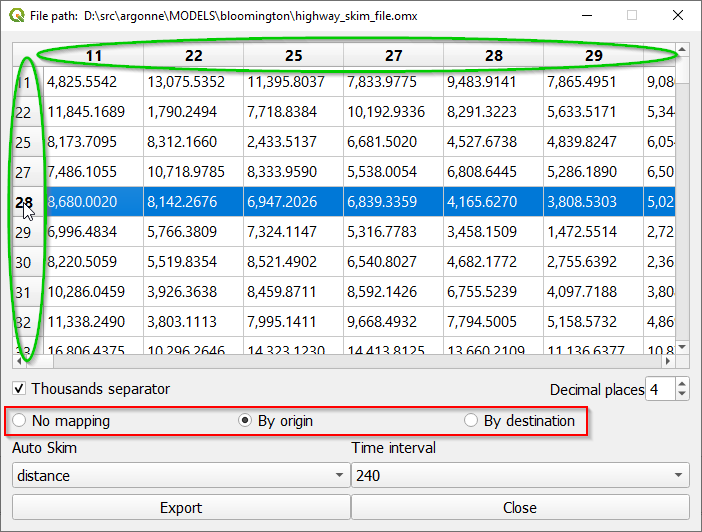
If the user opens a skim while having a supply file or projects opened in the plugin, the user is presented with a slightly different interface, where they can choose to plot a matrix by origin or destination.

The user can select to either just visualize the matrix and not map it, or to map rows or columns (highlighted in the red box) of the active skim matrix. After choosing what to map, the user can just click on the matrix headers (rows or columns, highlighted in green) and see the values corresponding to each one of the cells in the row/column selected

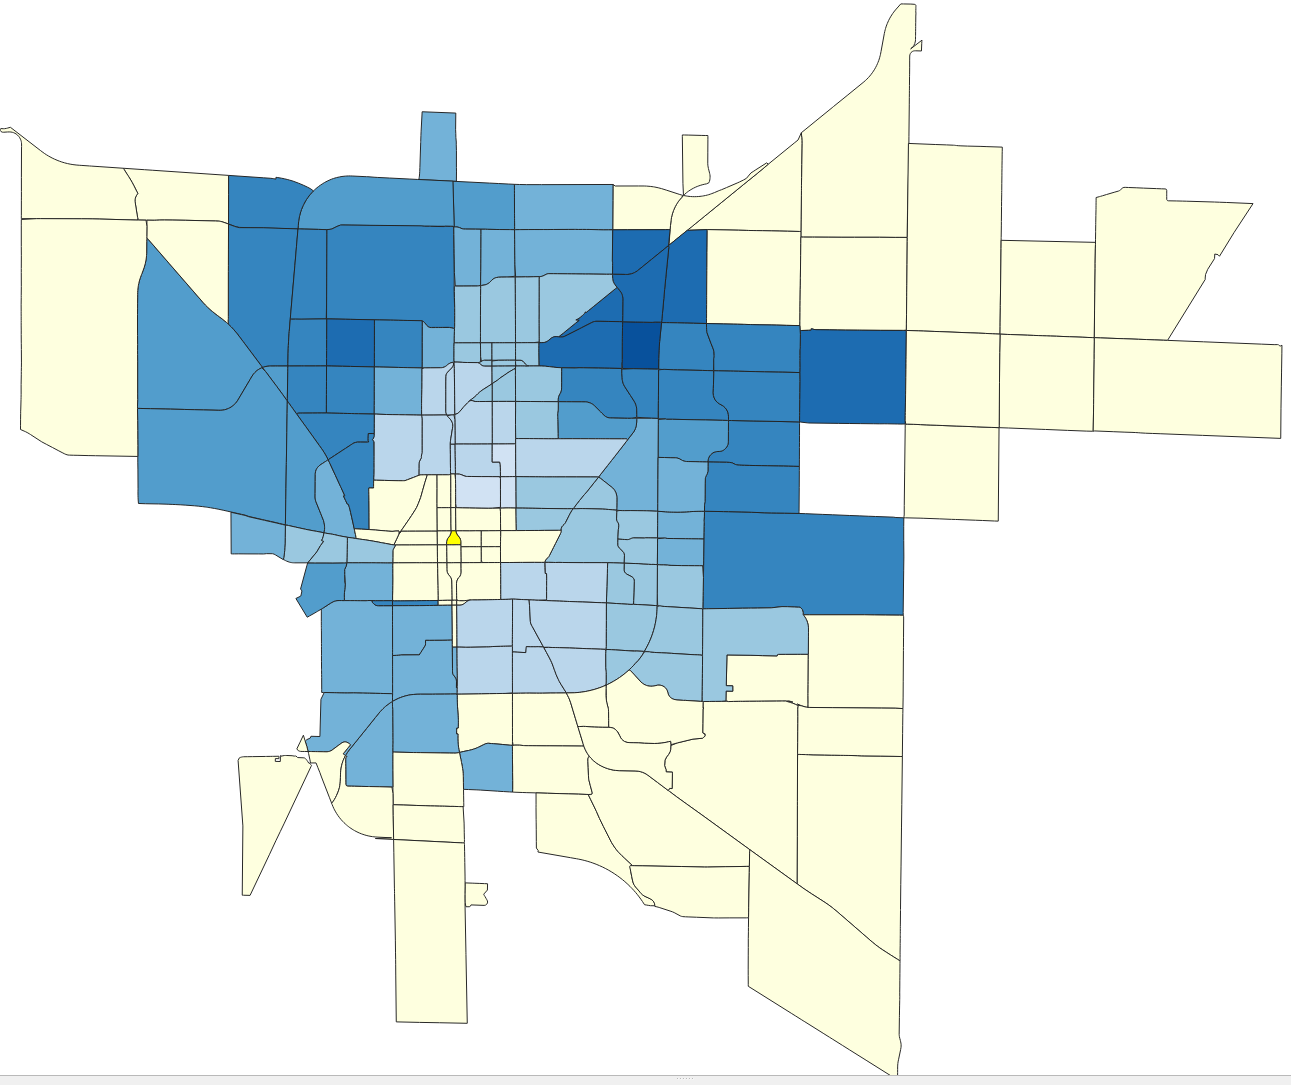
The zone corresponding to the selected row/colum will be selected in the zone layer (usually highlighted in bright yellow) and the zones for which cells are empty or infinite in the matrix will appear in light yellow, as shown above.