Setting Up Globus Connect Personal (GCP)#
Globus Connect Personal (GCP) sets up a data transfer channel between VMS file servers and LCRC-managed servers like Crossover and Improv. Using this channel, we can transfer data files between VMS and LCRC servers. A dedicated server is maintained by VMS to ensure speed of transfers on a high-bandwidth computer, but setting up GCP on individual desktops can be a stop-gap solution while a shared collection is being setup.
Downloading and Installing GCP#
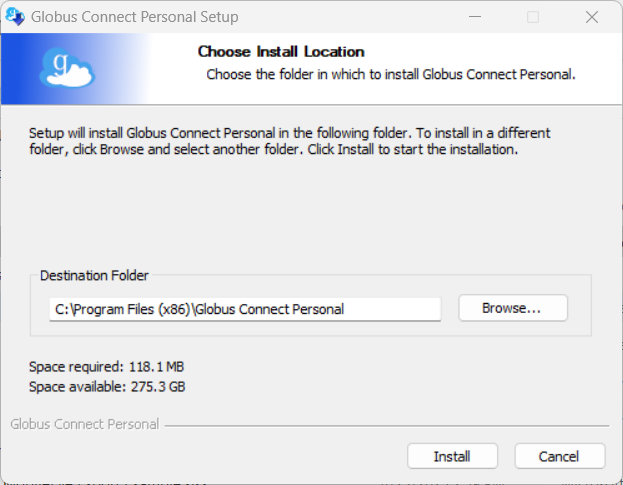
Step 1: To download the appropriate version for your operating system, login to Globus and download the platform-specific executable.
Step 2: Globus Connect Personal does require administrative privelages. If you do not have those privelages, request IT to install it for you. Follow the installation instructions on the GCP download page.
Creating an endpoint for a mapped network drive#
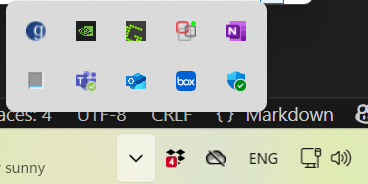
In your desktop tray, find Globus as shown in the top left corner of the image below. Right-click on the icon and click on “Options…”
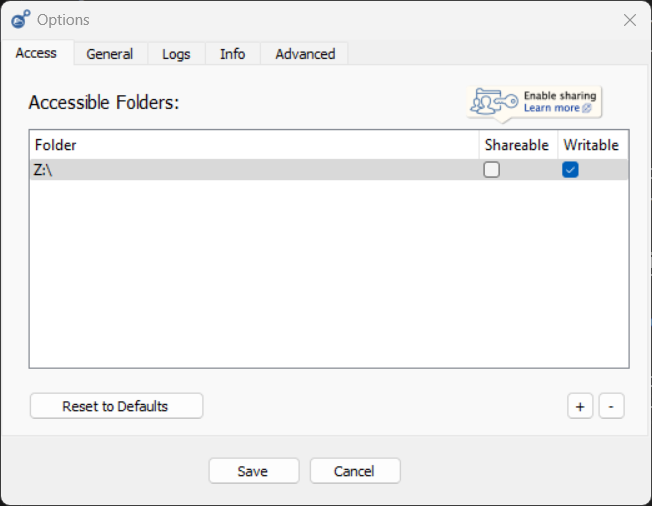
In Options (as seen below), go to “Access” menu. You may clean all folders from the Accessible Folders by selecting each folder and clicking on “-” button.
From File Explorer, go to This PC. From access bar, right click on “This PC” and select “Map Network Drive”.
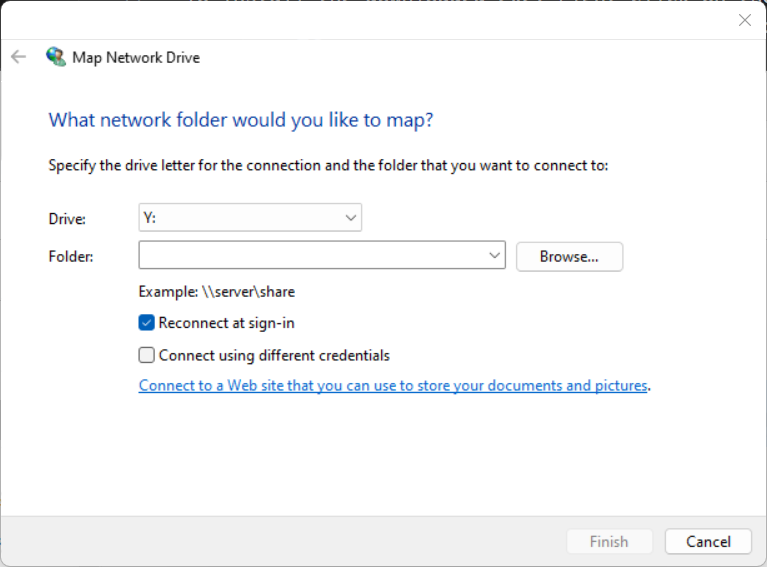
Here, choose a “Drive” and enter the full directory to the server location where data will be moved between VMS fileserver and LCRC, and finally click finish.
Go back to Globus Options, add this drive as a folder using the “+” button on the bottom right corner, and click “Save”.
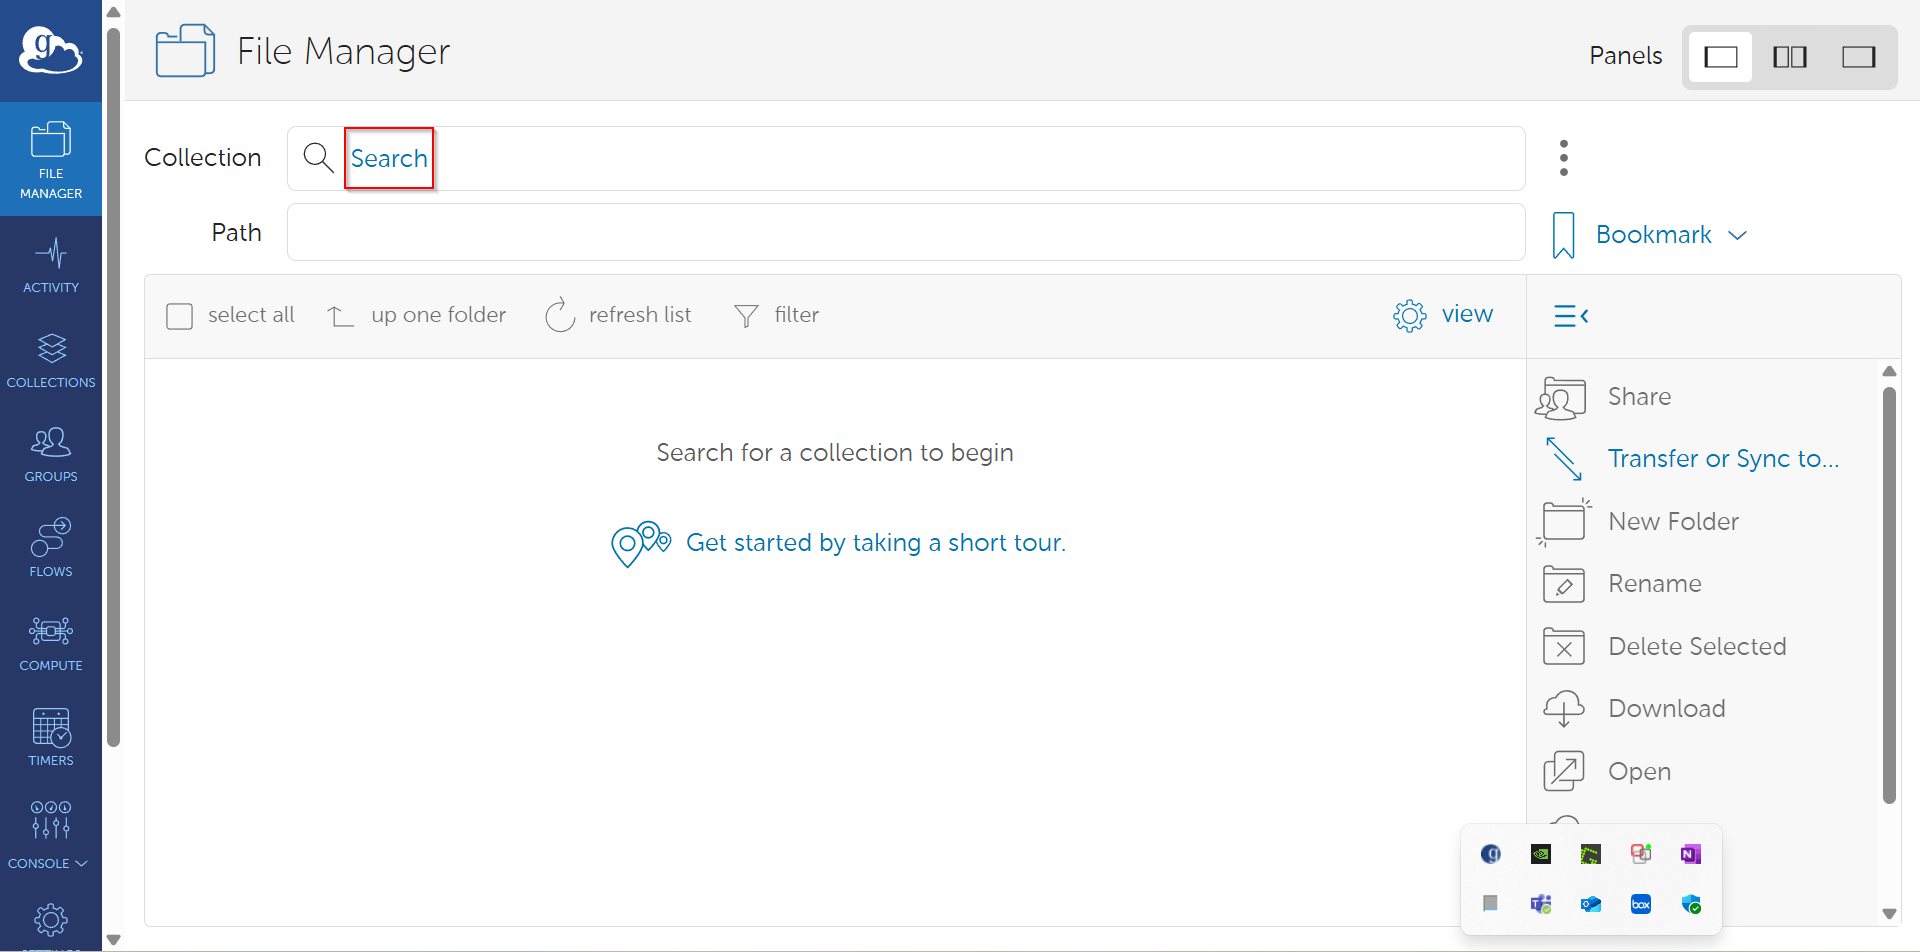
Finding the endpoint UUID#
In the Globus Webpage, “Log In” from the top right corner with your credentials. Once logged in, choose the Search bar from within Collection as shown in the image below.
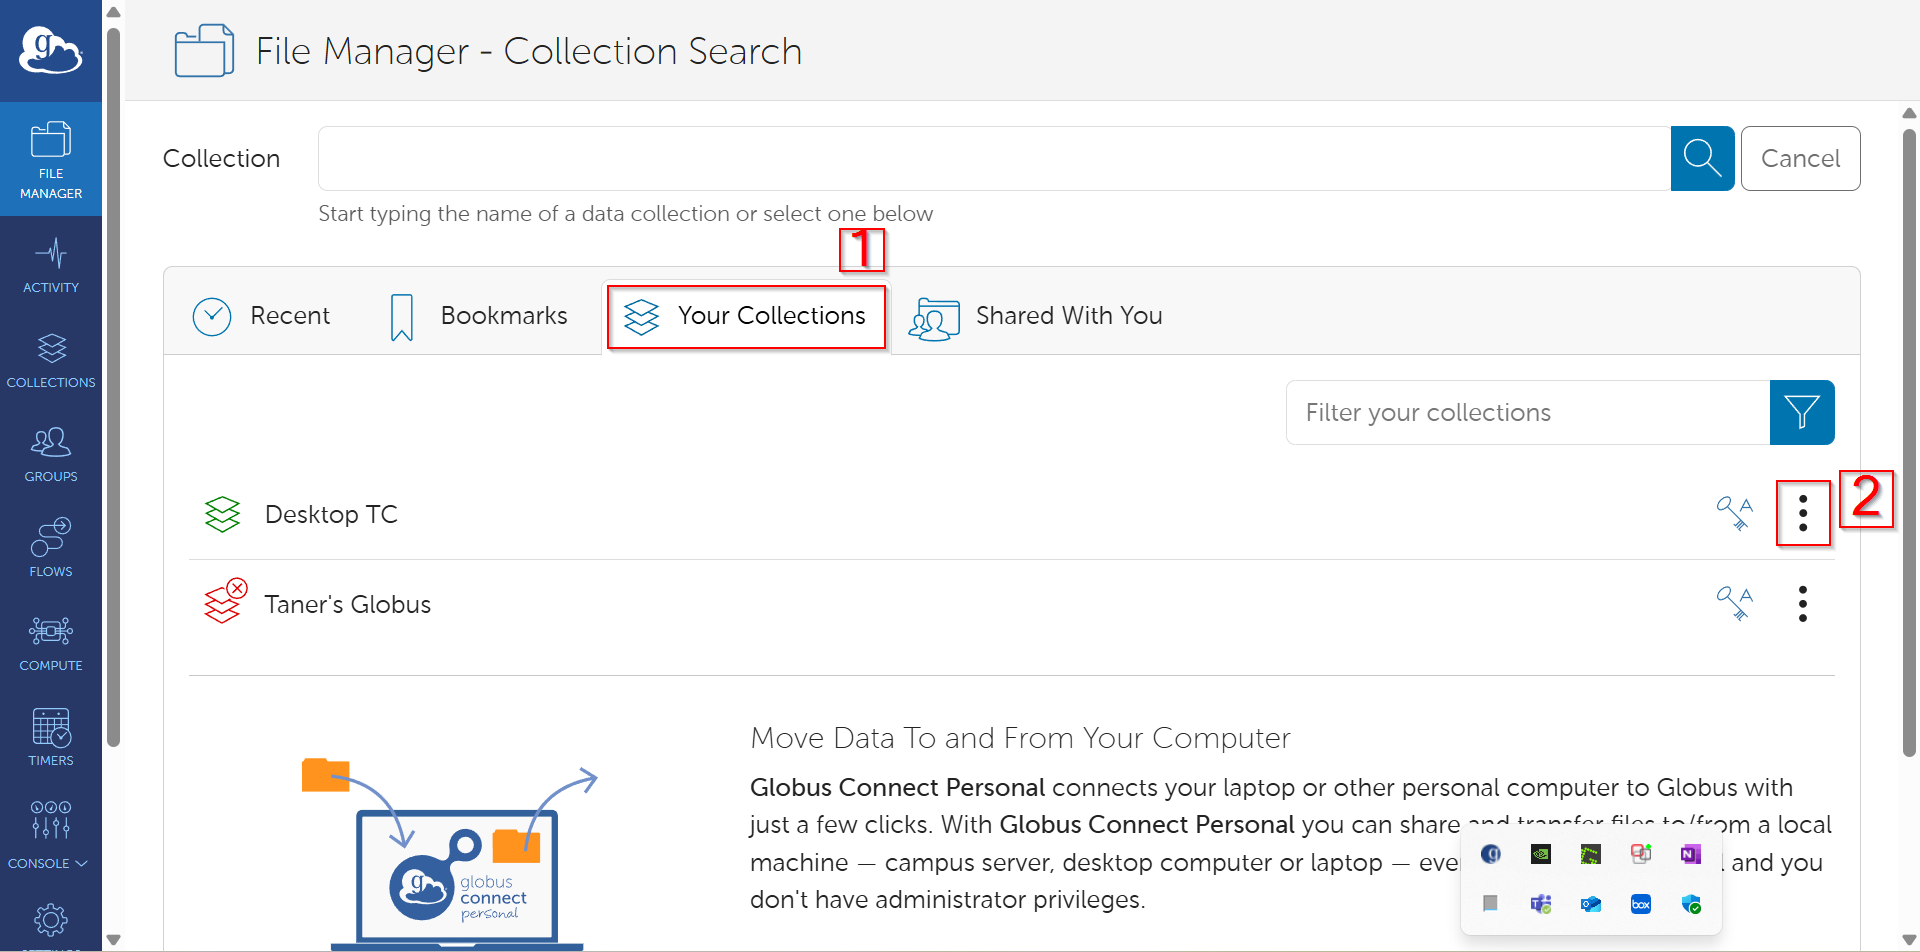
In the below page, first click on “Your Collections”, locate your mapped collection, and then click on the three dots as seen below.
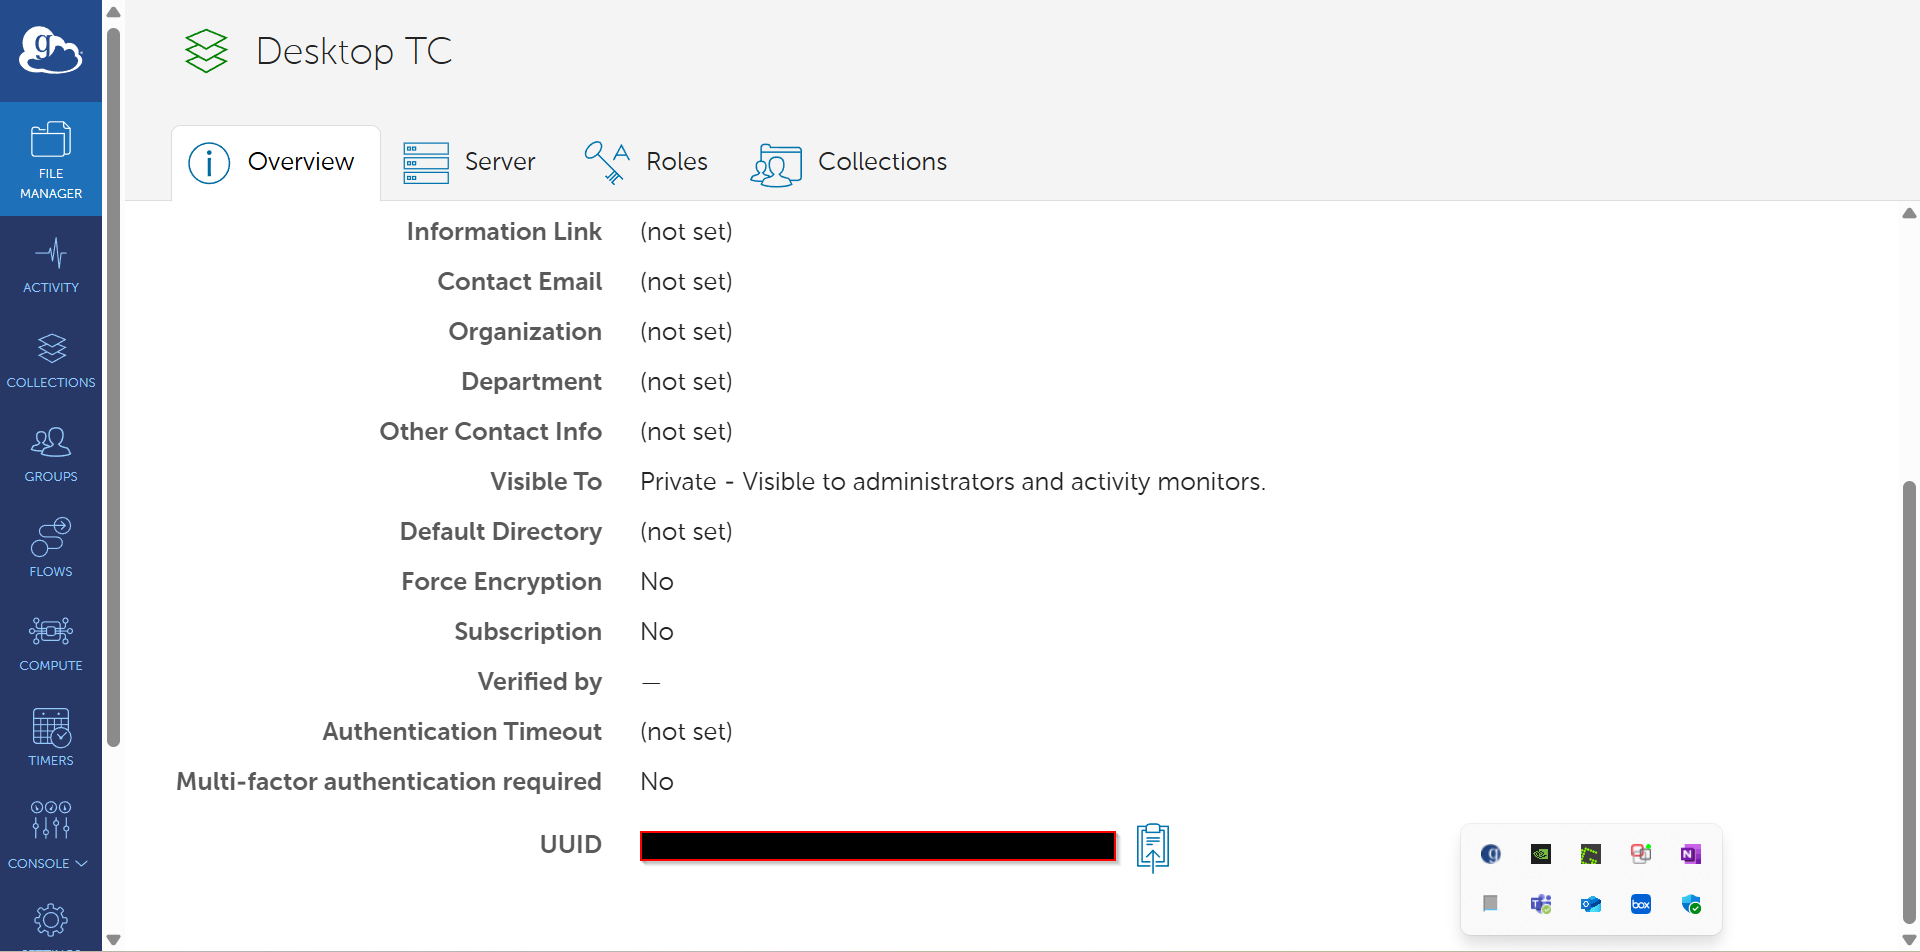
On the overview tab, scroll to the bottom and copy UUID. For instance, let UUID be 35bk345b-35kj435b43-3434363-34522-243242.
Adding the UUID in the task_def as additional-endpoints#
Now, when launching jobs with Polaris-Studio’s job manager, this UUID can be added as an additional endpoint as follows:
run_model_task_def = {
    "task-type": "python-module",
    "directory": str(target_dir),
    "entry-point": "path/to/main.py",
    "additional-endpoints": {"/mnt/q/FY24/2410 - YOUR STUDY": "35bk345b-35kj435b43-3434363-34522-243242"},
}